Lemon Garlic Chicken Legs Trim Healthy Mama S

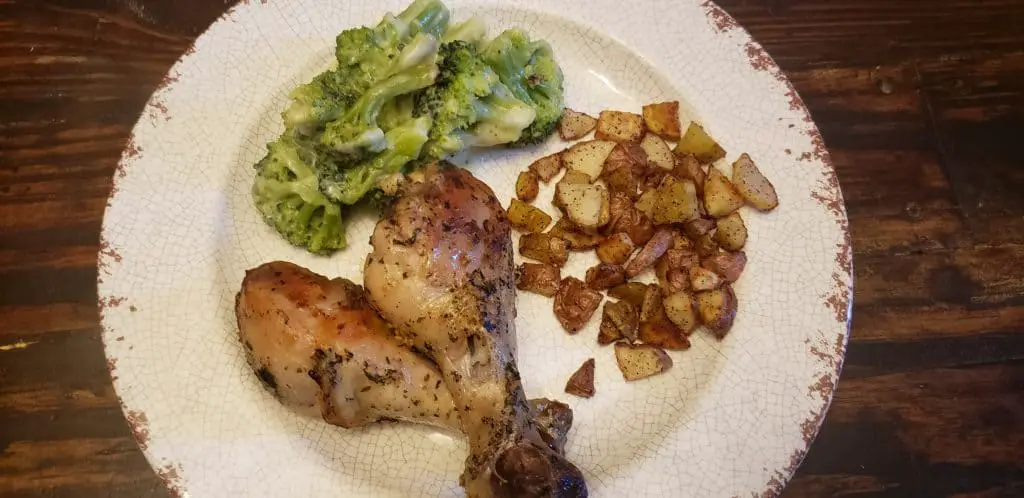
This is one of the recipes from my 30 freezer meals that I prepped in a day. I love taking the time to prep meals for my freezer and then pull out during busy times. I ended up having a busy day and had my son pull something out of the freezer for dinner. I came home to this bag. I put them on a lined baking sheet and baked them. I made air fried potatoes and a broccoli dish to go with it. This made the trim healthy mama s chicken legs a crossover with the potatoes. The potatoes are such a quick side to make, I usually make them once a month.

These chicken legs don’t have to be made ahead and stored in the freezer. You can mix up the marinade coat the chicken legs and bake them. Another idea is to make up the marinade in a baggie, add your chicken legs during your meal prep for the week. Then you can bake them during your busy week. If you don’t want a trim healthy mama crossover and want this to be an s meal, don’t add the potatoes. There are lost of sides you could add, mashed cauliflower, broccoli salad, roasted broccoli, side salad, oven roasted veggies, my favorite cauliflower recipe, or any side that sounds good but keep you in s meal territory. Also, you don’t have to use chicken legs, you can use thighs, breasts, wings, whatever you want.
Low Carb Lemon Garlic Chicken
Ingredients
- 1 1/2 Lb Chicken, I used legs
- 4 T Olive Oil
- 2 t Dried Parsley
- 3 T Lemon Juice
- 1/2 t Black Pepper
- 1 t Salt
- 2 T Minced Garlic
Instructions
- Dump everything but the chicken into a gallon baggie. Seal and squish the ingredients together. Add the chicken and move the legs around to coat. You can cook right away, refrigerate for a day or two, or place in the freezer until ready to eat.

- Preheat the oven to 400 degree. Line a baking sheet with parchment paper and lay the chicken on the sheet. Bake for 25 minutes, take the pan out of the oven and rotate chicken. Place back in the oven until the chicken is cooked through., about 15 more minutes.

- Allow to cool for few minutes before serving.


